

Import learners from a CSV or Excel file
Create many accounts at once: file, column mapping, review, then an import in the background. Missing teams are created.
In Manage your learners
The import creates many learner accounts at once, from a CSV or Excel file. It places each learner in their team and creates the teams and departments that do not exist yet.
The CSV and Excel import window guides you through three steps: File, Mapping and Review. The import then runs in the background.
Before you start#
- Only Administrators and Content managers can import learners.
- If your plan limits the number of learners, make sure you have enough free seats. Otherwise, the review shows how many seats are missing and the import cannot be started.
- Prepare a CSV or Excel (.xlsx) file, with one row per learner. The columns can be in any order.
| Column | Required | Good to know |
|---|---|---|
| First name | Yes | — |
| Last name | Yes | — |
| Yes | An address that appears twice in the file is imported only once. | |
| Department | Yes | Created if it does not exist. In the simplified journey, enter the name shown in the import window. |
| Team | Yes | Created if it does not exist in this department. |
| Password | No | Without a password, the learner receives the account creation email. With a password, they receive nothing: give them their sign-in details yourself. |
Department and team names are recognised regardless of capital letters.
Step 1: File#
- Open Employees, then click Import CSV / Excel.
- Click Choose or drop a file, or drag your file into the area.
- If your Excel workbook contains several sheets, choose the right one in Excel worksheet.
- Check the The first row contains column names box.
- Click Next.
If the file is rejected, the app tells you why, for example: "This file is unreadable or malformed. Check it and try again."
Step 2: Mapping#
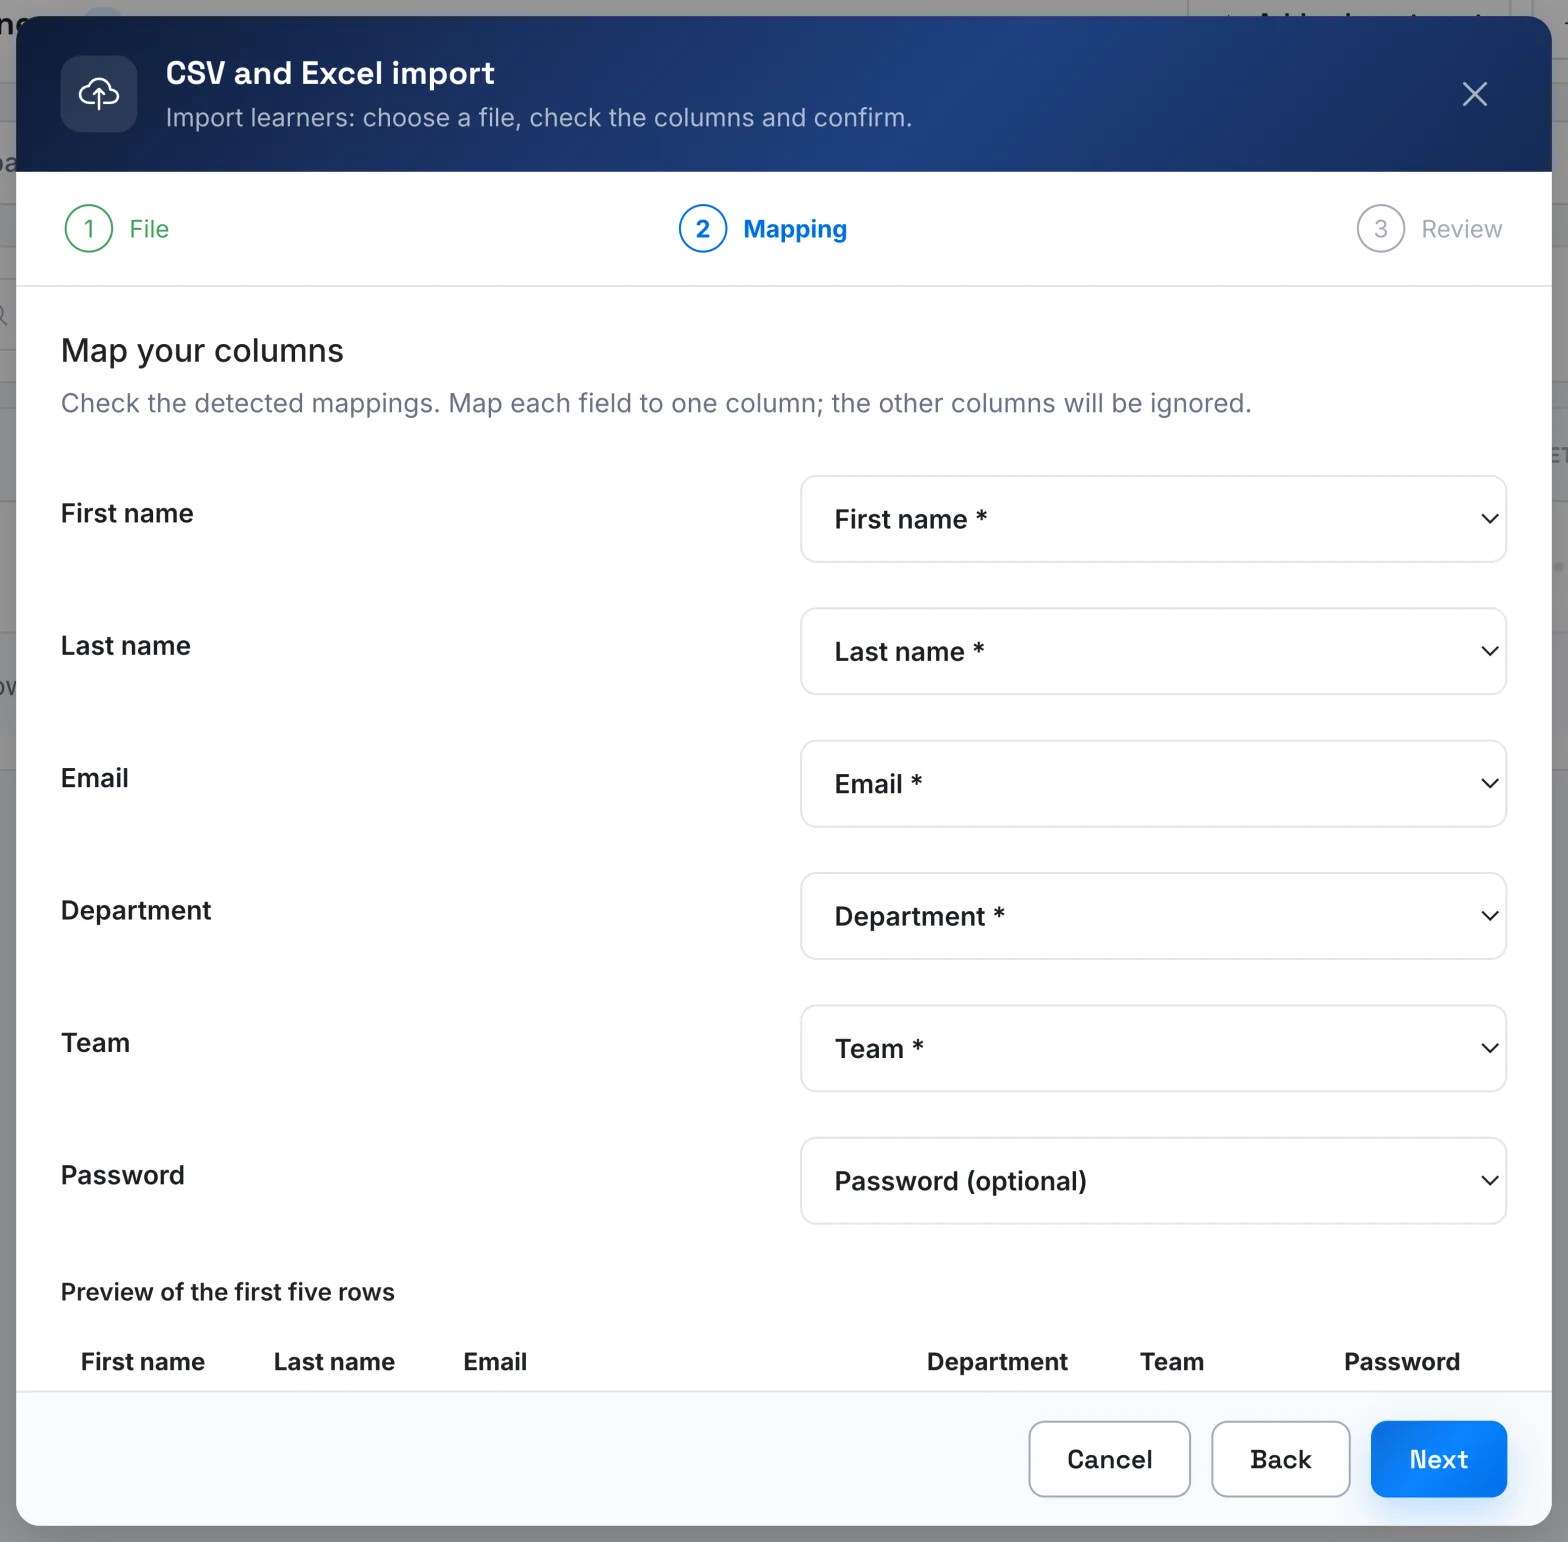
Complement automatically maps the columns whose title it recognises. Check each mapping: choose the right field, or Do not import this column. A preview of the first rows helps you check. When each required field has its column, click Next.
Step 3: Review#
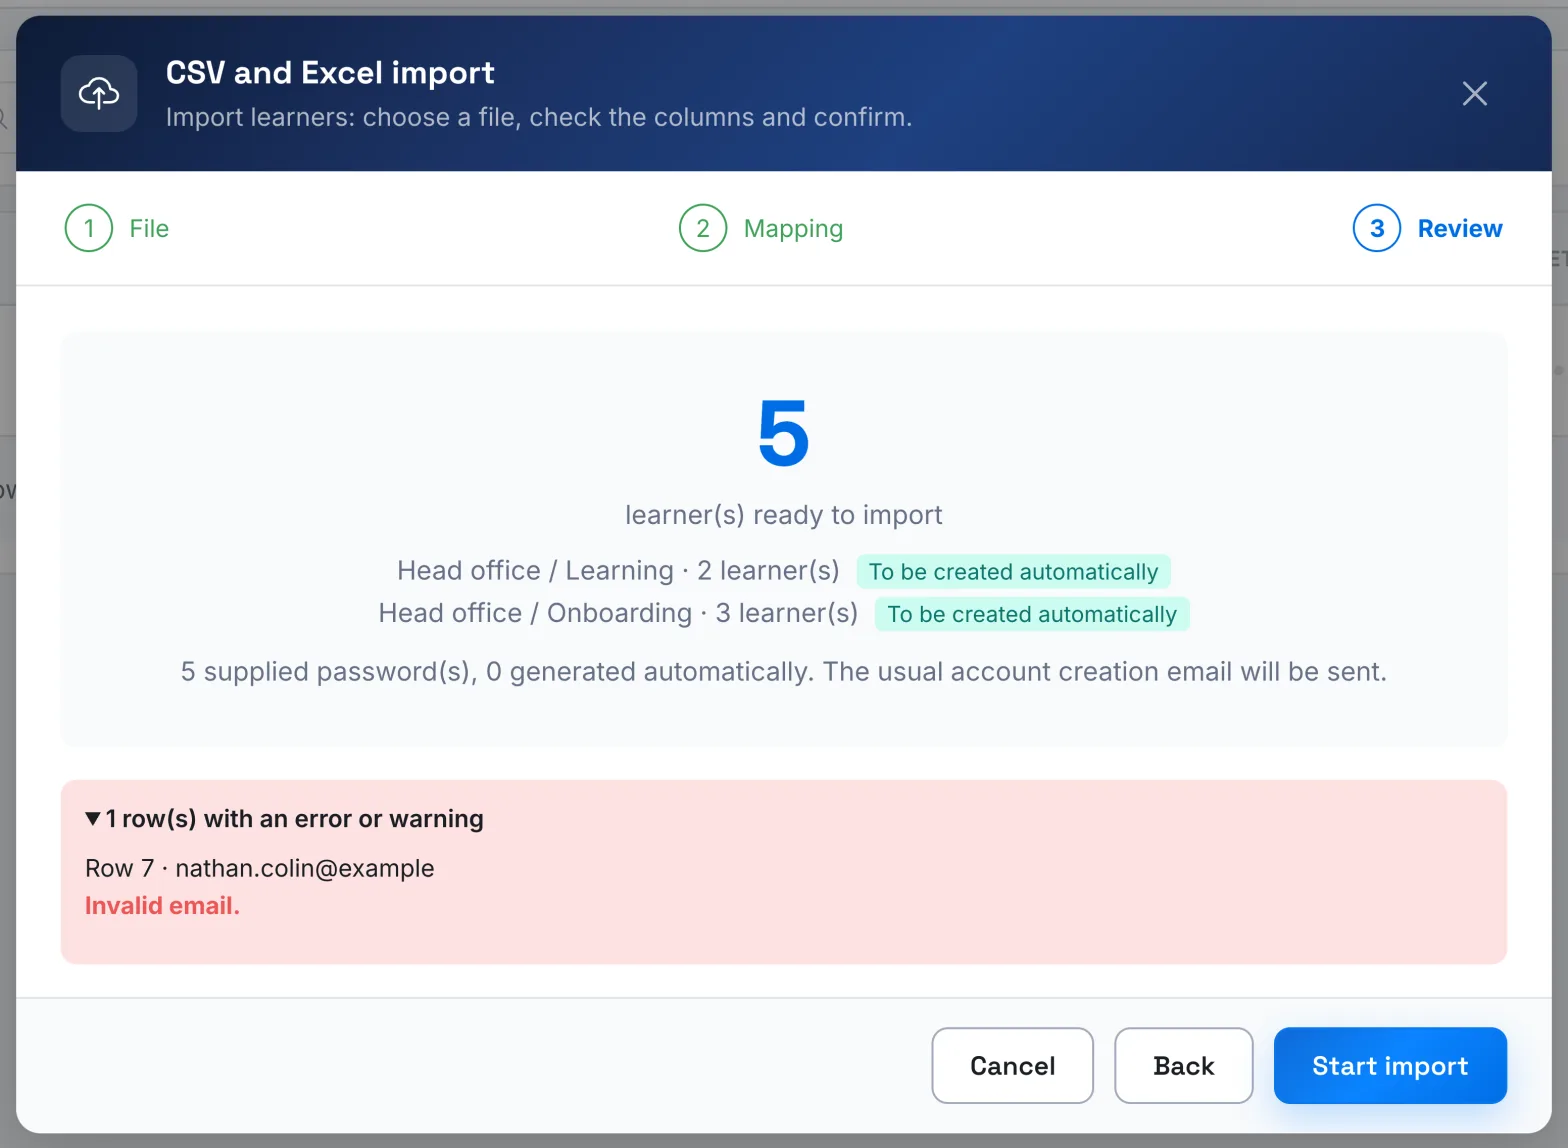
The review shows the number of learners ready to be imported and their destinations (department / team). Destinations that do not exist yet are marked To be created automatically. It also shows how many passwords are supplied and how many will be generated.
Rows with an error or a warning are listed with the reason: missing field, invalid email, password too short, duplicate address, ambiguous destination name. These rows are not imported.
Click Start import.
Follow the import#
The message "The import is running in the background. You can keep browsing." appears. To follow the progress, click View details, or the Import in progress button at the top of the page. At the end, this button becomes Import result.
| Status | Meaning |
|---|---|
| Import queued | The import is about to start. |
| Import in progress | The accounts are being created. |
| Import completed | All the accounts have been created. |
| Import completed with warnings | Some rows did not go through. The details give the reason, row by row. |
| Import interrupted | Processing stopped before the end. The accounts already created are kept. |
In the details, "A user with this email address already exists" indicates an existing account, which is not created again. If the app shows "The user was created, but the account email could not be sent", send them a reset link.
Resume an import#
- If the import is interrupted as soon as it starts, the window shows "The import was interrupted. Confirmed batches are kept. Resume the remaining rows; the server will check for accounts already created." Click Start import again: the accounts already created are not created again.
- After an import completed with warnings, correct the rows concerned and import the file again. The accounts already created are reported as existing, without duplicates.
After the import#
The teams created by the import have access to your onboarding course, if you have one. Then give them access to your other courses: see Give access to a course.
Was this article helpful?
Thank you for your feedback!
Thank you. Tell us what is missing through Help and support in the app, and we will complete the article.