

Organise chapters
Add, rename, reorder, split, duplicate or delete a chapter, copy its share link and browse the course with the outline.
In Create a course
- Understand the structure of a course
- Create a course
- Generate a course with AI
- Import a PDF or images
- Organise chapters
- Edit a slide
- Write the avatar script
- Edit a slide visual with AI
- Add interaction questions and surveys
- Add a video
- Create the end-of-chapter quiz
- Add resources to a course
- Saving and editing with others
- Preview a course
- Publish a course
- Course settings
- Course completion rules
- Trainer rights on a course
- Manage your courses
- Export a course to PDF
Chapters divide your course into stages. In the editor, you create, rename, reorder and delete them. Every change is saved automatically in the draft: your learners only see it after publication.
Before you start#
- You must be able to edit the course: see Trainers' rights on a course.
- Everything happens in Trainings › your course › Edit training.
Read a chapter header#
The header shows the chapter's number and title, its number of items (slides and quiz questions) and an estimated duration. This duration is calculated from the scripts, the questions and the length of the videos.
Click the header to collapse or expand the chapter. The editor remembers, in this browser, which chapters you have collapsed.
Add a chapter#
- Add chapter, below the last chapter, adds a chapter at the end.
- New chapter, between two chapters, inserts one at that point.
The new chapter is empty, with a quiz question to complete. To fill it, see Understand the structure of a course.
Rename a chapter#
Click the title in the header and type the new one. A chapter that keeps its default title, "Chapter" followed by a number, is renumbered automatically when it moves.
Reorder chapters#
Grab the chapter by the dotted handle at the start of its header and drag it to its new place. As soon as you grab the handle, all chapters collapse to make dropping easier.
Split a chapter#
Below the slide after which you want to split, click Add content › Chapter. The following slides move into a new chapter, placed just after.
The chapter's quiz follows the moved slides: it moves to the new chapter. The first chapter receives an empty quiz question, which you fill in before publishing.
Duplicate, share or delete a chapter#
Click the Chapter actions button (the three dots) in the header.

- Duplicate chapter: creates a full copy, slides and quiz included, just after the original.
- Copy share link: copies a link that opens this chapter directly. The message "Chapter share link copied" confirms it. The learner must sign in and have access to the course: see Share a link to a course or chapter.
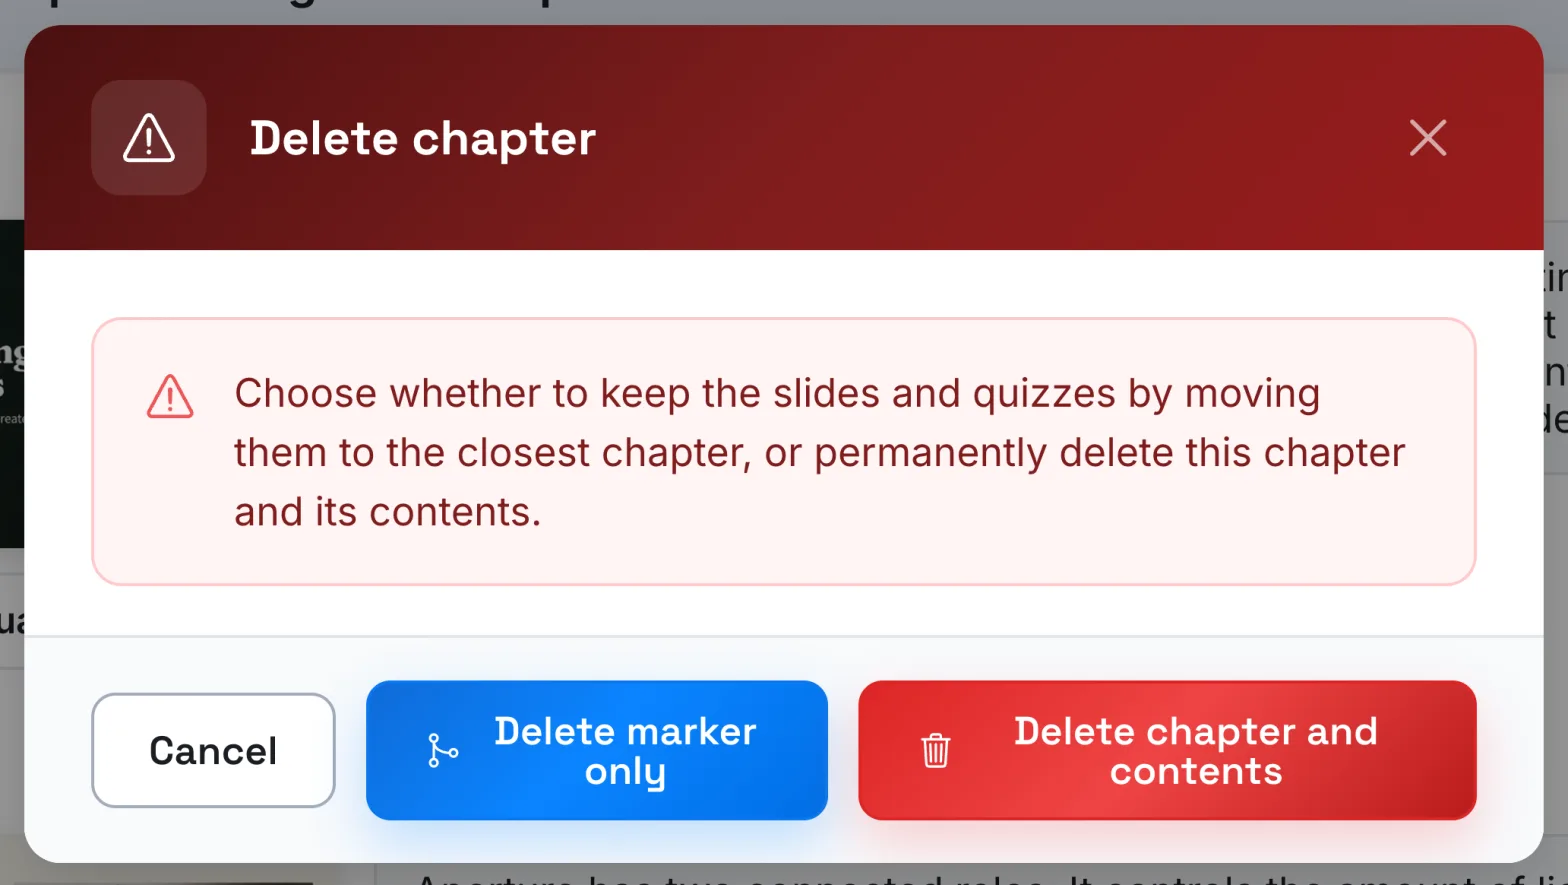
- Delete chapter: opens a confirmation window, which offers two choices.
- Delete marker only: the chapter disappears, but its slides and quiz questions join the previous chapter, or the next one if it is the first chapter.
- Delete chapter and contents: the chapter, its slides and its quiz are deleted.
If only one chapter remains, only deleting the chapter and its contents is offered.
Browse the course with the outline#
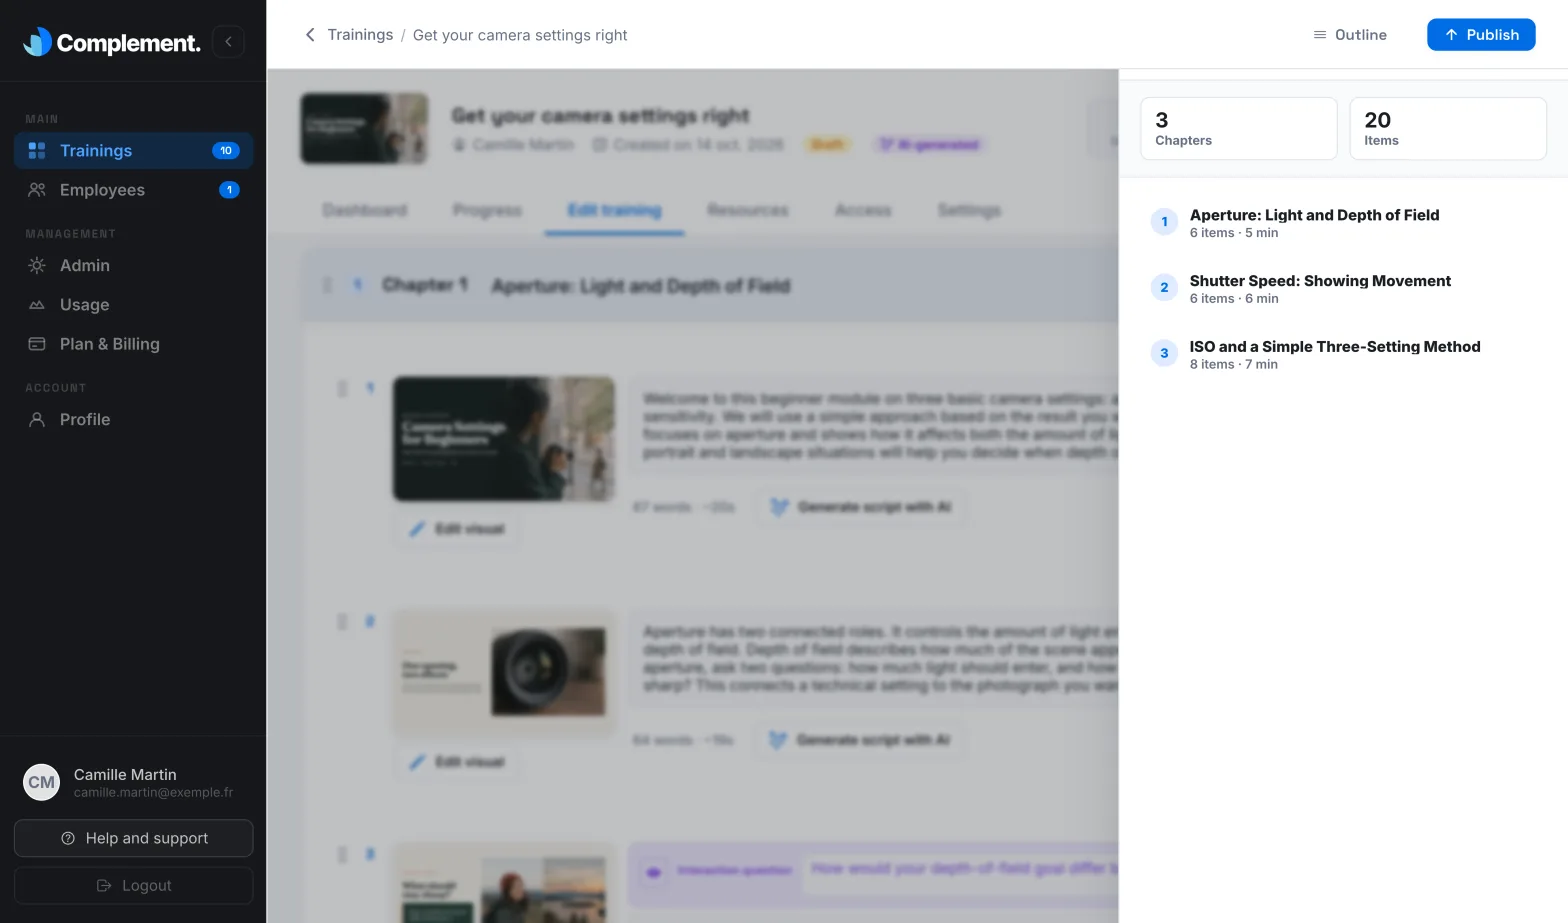
Click Outline, at the top right. The Training outline panel shows the total estimated duration, the number of Chapters and Items, then the list of chapters. Click a chapter to go straight to it: it expands.
Was this article helpful?
Thank you for your feedback!
Thank you. Tell us what is missing through Help and support in the app, and we will complete the article.