

Manage your courses
Find and organise your courses: filters, search, sorting, grid or list view, folders, renaming and duplication from the course list.
In Create a course
- Understand the structure of a course
- Create a course
- Generate a course with AI
- Import a PDF or images
- Organise chapters
- Edit a slide
- Write the avatar script
- Edit a slide visual with AI
- Add interaction questions and surveys
- Add a video
- Create the end-of-chapter quiz
- Add resources to a course
- Saving and editing with others
- Preview a course
- Publish a course
- Course settings
- Course completion rules
- Trainer rights on a course
- Manage your courses
- Export a course to PDF
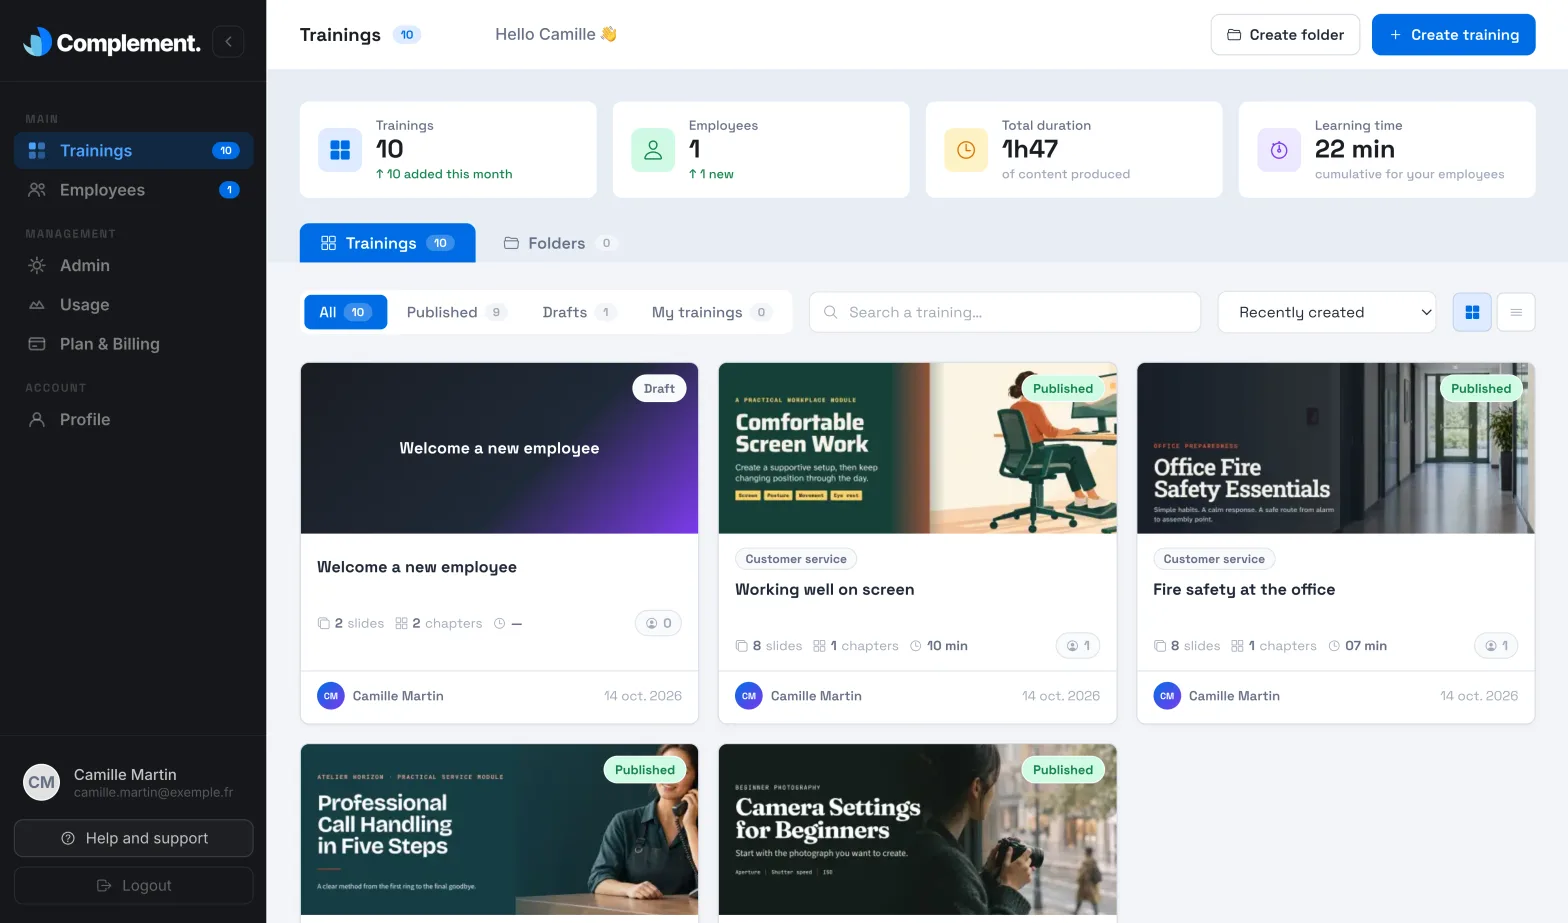
The Trainings menu lists the courses you have access to. There you can filter and sort your courses, and organise them into folders.
What you see#
- Administrators and Content managers see all the courses on the platform.
- A Trainer or Guest sees the courses on which they have read or edit rights, and those they are an author of. See Trainer rights.
Each card shows the Published or Draft status, the course's folders and teams, its number of slides and chapters, its estimated duration, its number of learners, its authors and the date it was last modified. Click a card to open the course.
Create a course or a folder#
At the top right, Create training opens the creation window: see Create a course. If you are in a folder, the new course is placed in it.
Create folder is described below. Guests do not see these buttons.
Filter, search and sort#
- The All, Published, Drafts and My trainings filters each show their number of courses. My trainings groups the courses you are an author of.
- The Search a training… field searches titles, descriptions and author names.
- The sort menu offers Recently modified (the default order), Oldest modified, Recently created, Oldest created, Title A-Z and Title Z-A.
- The two icons on the right switch between Grid view and List view. The list shows the Training, Teams, Employees, Modified and Actions columns.
Course actions#
They appear on the card image in grid view, and in the Actions column in list view.
- Manage folders: tick the folders where the course should appear, then click Save.
- Duplicate: check the suggested name, which ends with "(copy)", then click Duplicate training. The copy is placed in the same folders. For details of what it includes, see Course settings.
- Rename: enter the new title in Rename training, then click Rename.
Organise your courses into folders#
Folders are shared by the whole teaching team. A course can be in several folders. Each person only sees the courses they have access to.
To create a folder:
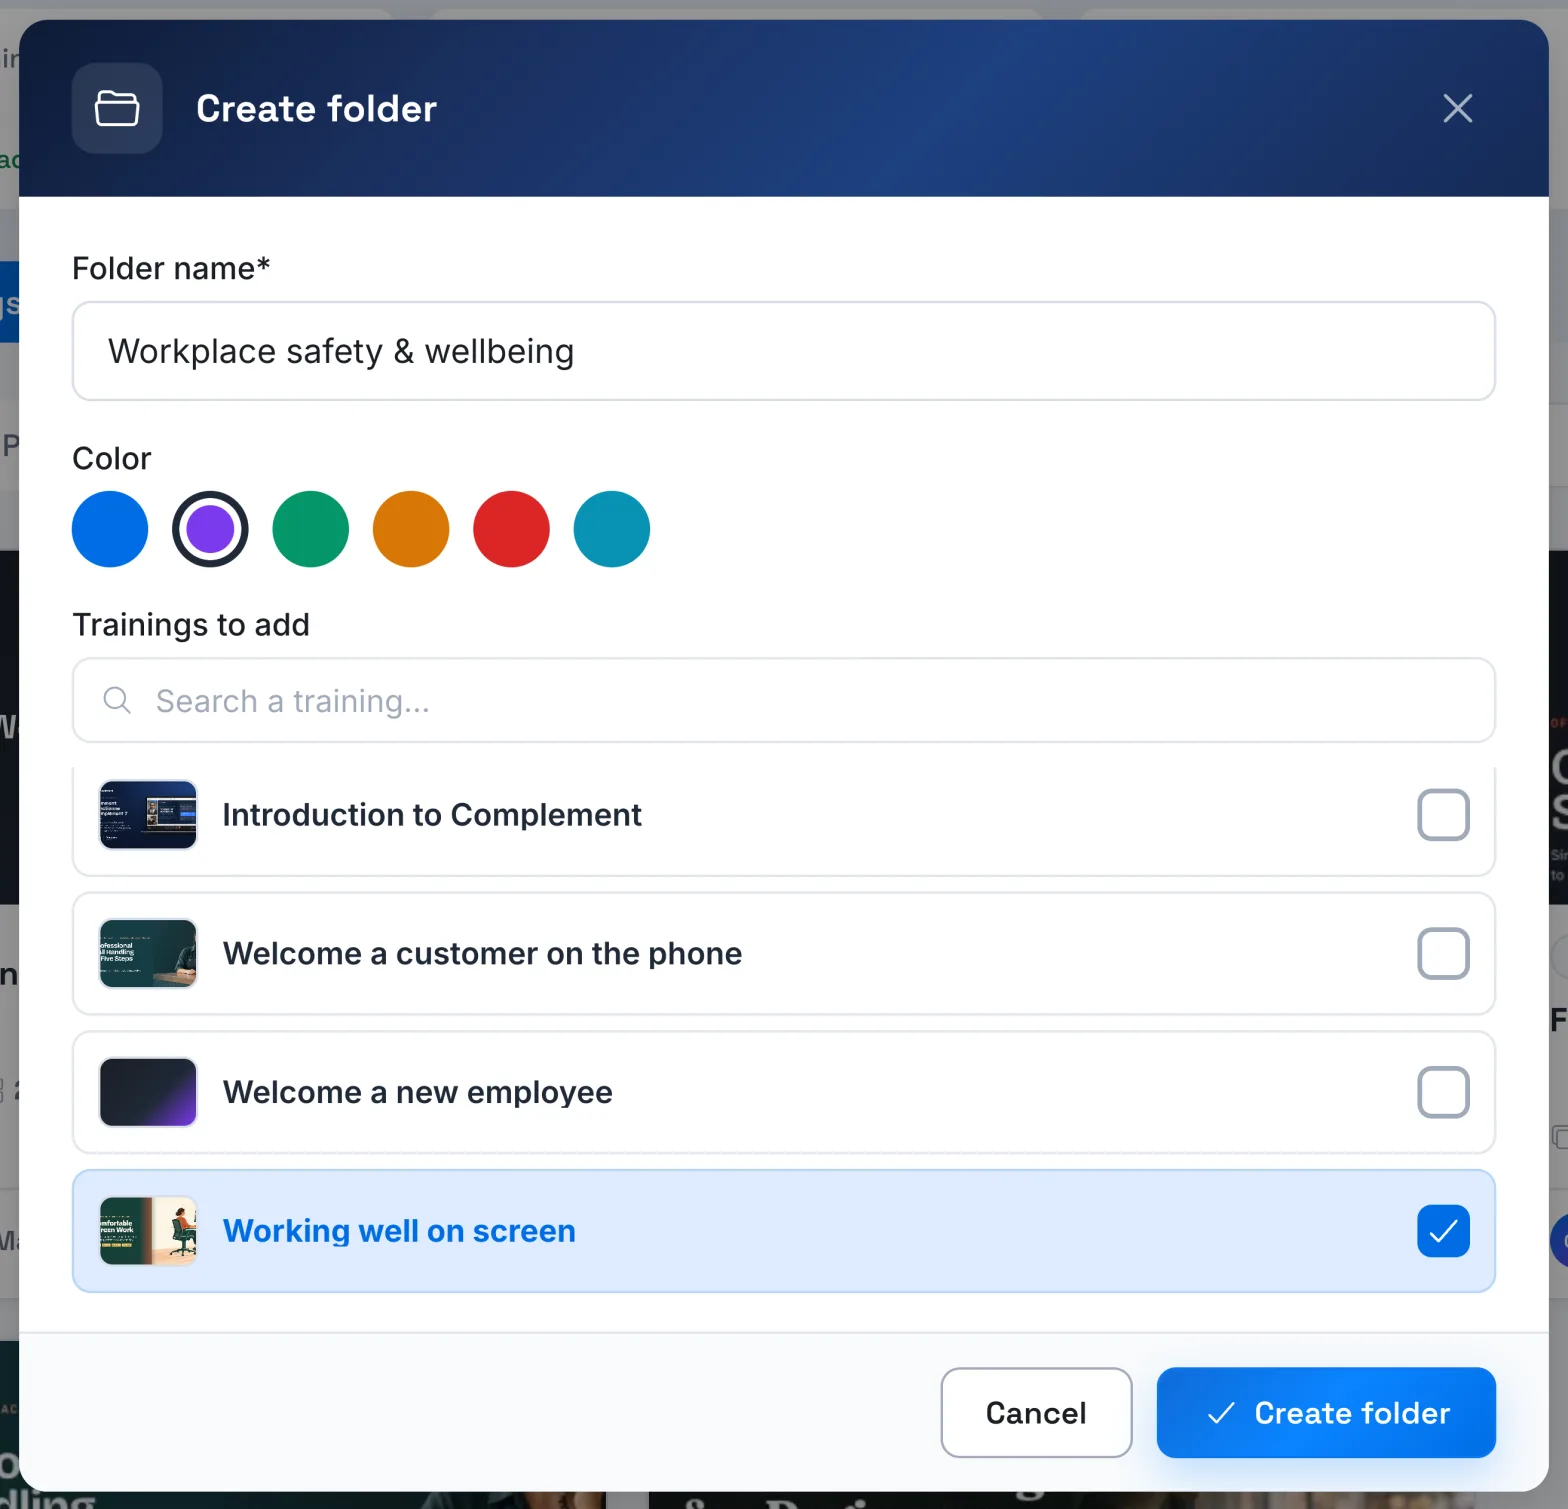
- Click Create folder.
- Enter the Folder name and choose a Color.
- In Trainings to add, tick the courses to place in it.
- Click Create folder.
The Folders tab shows your folders. Click a folder to open it. Inside:
- Add training opens the list of courses to tick or untick;
- Rename lets you change the name and colour of the folder;
- Delete deletes the folder. The courses it contains remain available: no content is deleted;
- All folders takes you back to the list of folders.
Delete a course#
You cannot delete a course from the list. Open the course, then go to Settings › Danger zone. See Course settings.
Was this article helpful?
Thank you for your feedback!
Thank you. Tell us what is missing through Help and support in the app, and we will complete the article.